")
April 1, 2019
Makeup Go-To’s for Weddings from H&MU Artist Kali Sturgis | Arden Photography
Hi! Kali, here! Not only am I Arden’s intern, but I also do hair and makeup for weddings, pageants, and formal events.
When I think weddings, I think glowing bride. And by glowing, I mean highlight, highlight, and oh, did I mention, highlight?
My go-to makeup for brides and bridesmaids, unless if they know specifically what they want and/or provide examples, is light, shimmery eye shadows, dewy skin, and nude, pink-y lips. I feel that this look gives enough drama to the client while also not taking away from their natural beauty. Enhancing is the goal.
Contrary to most beauty routines, I usually start with the eyes. This allows easier clean up of fall-out and less stress on the artist for accidents. I lightly fill-in the brows before starting eyeshadow, and then I come back in with an eyeshadow primer and/or concealer to clean up the brow and prime the eyes for eyeshadow. Eyebrows are SO important because they are what frame one of the most important features of your face. The key with eyeshadow is to BLEND and build the color. It is a lot easier to make an eye darker than to lighten it up. Pearls and champagnes make for beautiful brow bone, inner corner, and inner eye highlight and ultimately brighten up the eyes and make them appear brighter and more awake. From there, I tend to stick to neutral, warm browns and light oranges as transition shades in the crease, and bronze and deep browns for the outer corner. Whatever I use on the lid, I drag down below the lower lash line. THIS IS SO IMPORTANT to pull together the eyeshadow. It makes the eyeshadow look complete and balances the eye out. If someone likes darker eyeshadows, I’ll add dark gray or black to the outer corner, but like I said earlier, it is much easier to ask the client what they would prefer after the final look is complete. People ALWAYS have different thoughts on what natural and glam makeup look like, so it’s much easier to build up the color than try to take away. For eyeliner, I stick to browns in the waterline because it is not as harsh as black, and on the lid, I usually only use a deep brown or black eyeshadow on a thin angled brush to have a soft, smokier look.
On to lashes! A good mascara is a must, and I love L’Oreal’s Lash Paradise… waterproof of course. We’re talking about the chance of tears looking pretty high, always happy ones though. I always recommend fake lashes to every client. To me, they pull together any look and add extra glam to the bridal party. If clients are wary about strip lashes, individual lashes are a great alternative. They tend to feel less invasive, and they can be built up to suit any person’s preference. The great thing about fake lashes, too, is that they’ll come off when you wash your makeup off!
After eyes, I move on to foundation, cleaning up any fall-out around the eye before applying. Doing it in this order is just preference, though. Personally, I feel that it can make for a cleaner, accident-free session. Regarding foundation, you don’t want something cake-y or drying, so I try to steer myself toward light-to-medium coverage foundations like Fenty Beauty or Estee Lauder. I usually use a damp beauty blender to pat on the foundation onto the client’s face. The beauty blender allows you to control the coverage of the foundation pretty well, so as not to cover up too much. Unless if asked to do so, we LOVE to see brides’ and bridesmaids’ freckles and moles! After foundation, I’ll use concealer to get the under-eye and spot treat any additional problem areas. Remember the goal is to enhance, not cover up.
Once base is complete, I usually go in with a baking or banana powder and set along the under eye, across the forehead, down the bridge of the nose, on the chin, and underneath the hollows of the cheek. To me, this adds extra definition and dimension to the face. A bronzer/contour powder is used next to shade and add more color to the client’s face. It is very important to make sure that whatever shading color you are using is not too orange or too gray. We don’t want Cheetos or the Walking Dead to be present at the ceremony. Then I go in with blush on the apples of the cheek. I tend to be attracted more to rosy pinks, corals, and peaches because I feel they give the most natural looking “blushing bride” face.
Then, to my FAVORITE part. H I G H L I G H T. To me, highlight adds that extra glow, sparkle, and oomph to any bridal makeup. I usually go for champagnes, golds, pearls, and light pink highlighters, as they seem to blend more seamlessly into the skin and compliment a wide array of complexions. I place it along the high points of the cheekbones, lightly down the bridge of the nose, on the cupid’s bow, center of the chin, and my favorite spot ABOVE the brows.
After finishing the face, I do the lips. Most of the time the bride or bridesmaid know what colors they want to use, have to use, or prefer, but if not my go-to is a nude or light berry pink. I fill in their lips with a corresponding lipliner color first, as this prevents lip color from bleeding and allows the color to stay longer and be more vivid. Then, I go in with the desired lip color. I tend to be drawn to lip glosses more so than lipsticks, but it’s always up to the client’s preferences.
Lastly, to set everything in place I use a setting spray (Morphe’s is one of my faves), and then I lightly pat in the setting spray with the previously used damp beauty blender, as I have found that this melds the makeup more seamlessly into the skin.
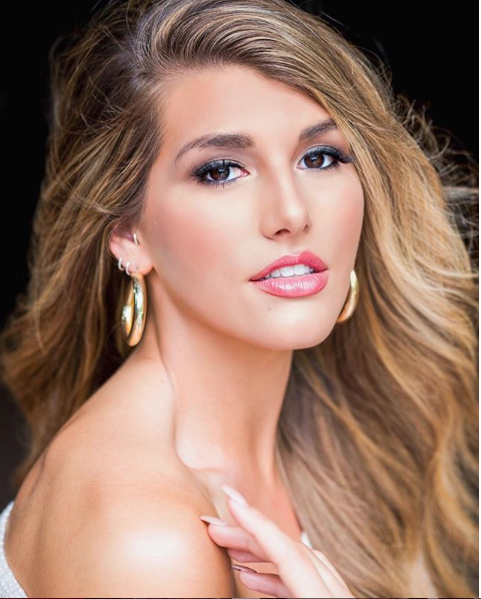
Photo by: Arden Upton H&MU: Kali Sturgis
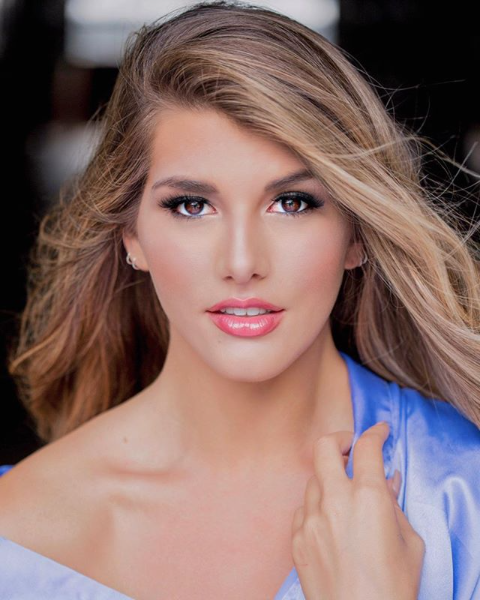
Photo by: Arden Upton H&MU: Kali Sturgis
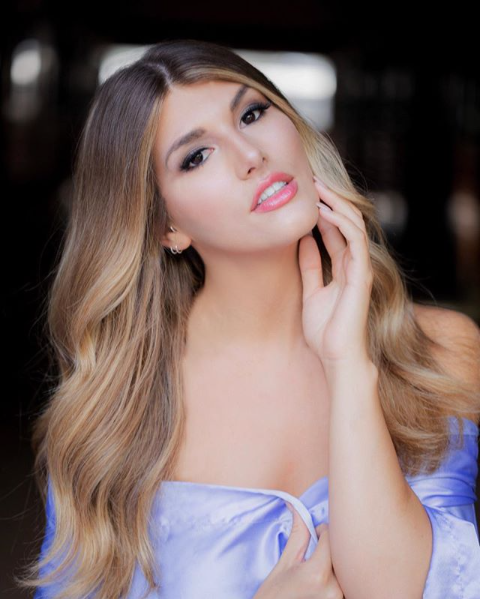
Photo by: Arden Upton H&MU: Kali Sturgis

")
")
")